Close any farms that are open before starting a restore.
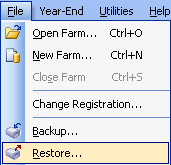
Choose File: Restore from the menu to open the Restore Farm Database window.
The Restore Farm Database window will open. Click the Browse button to find the backup set to restore from. This file may be on a USB removable drive, zip disk, CD, or located on your computer. The backup set may be comprised of several files depending on the storage capacity of the backup media.
– The farm number and farm name identifies the backup set by default and the file has a .001 extension.
– To create a log when restoring the farm, click the Create Log File option. If you are setting up a new computer, check “Restore Control Folder” to have your registration information automatically restored.
– Press Next to continue.
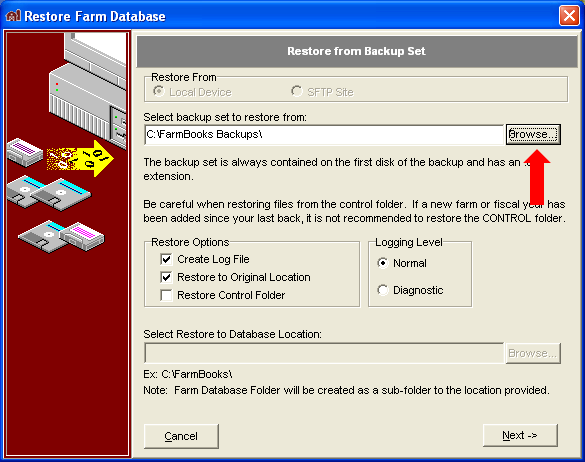
The Select Files to Restore window will open. If you are restoring a single farm database, simply click the top checkbox to select all files to restore. However, if you are restoring from a multiple farm database then click the plus (+) signs in the tree until you see the farm number and farm name to restore. Click the check box beside the farm to be restored and then click Finish. There is also a folder named “Control” if you checked “Restore Control Folder” and by default this is unchecked. This could be used to restore your registration information and available fiscal years. You can restore all farm files or a single farm.
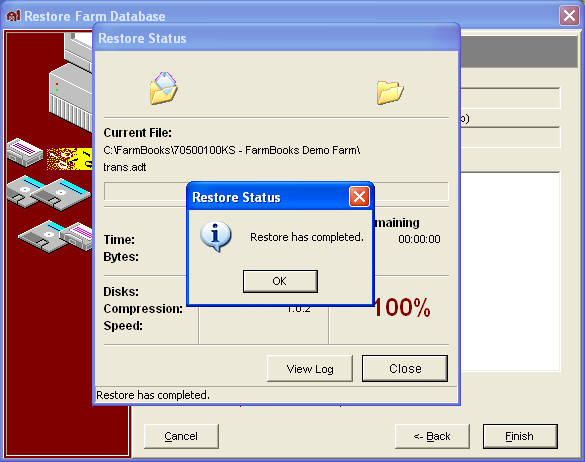
Click OK and then close out of the Restore Farm Database window when completed.
 There is also a folder named “Control” if you checked “Restore Control Folder” and by default this is unchecked. This could be used to restore your registration information and available fiscal years. You can restore all farm files or a single farm.