Checks – General Instructions
- Click on the Checks tab

- Select a Bank Account and Fiscal Year if necessary, or accept the defaults. The selected bank account balance will display on the top line with Bank Account and Fiscal Year.
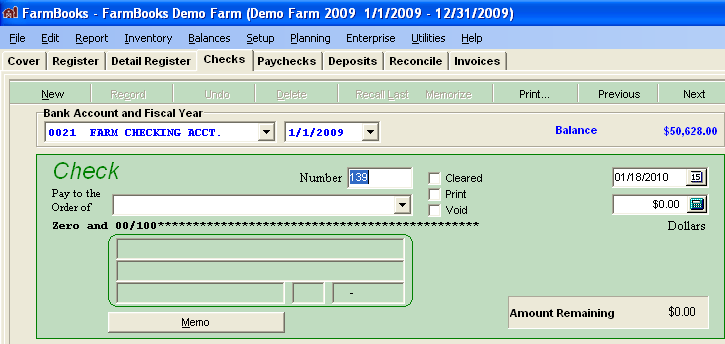 Check Number – If FarmBooks is printing the check, the check number field will display “PRINT” and the check number will be added when the check is printed. When entering checks manually, “NEXT” will display in the check number field and when you start entering the check number, NEXT will be overwritten. If NEXT is left in the number, it will be replaced by the next check number in the Bank Account record when the transaction is saved. To determine the next check number that will be used by NEXT see Balances: Bank: Next Sequence Number.Check Date – Enter the check date or choose a date from the calendar. Once a date has been entered, it will be the default for additional checks until it is changed.
Check Amount – The check amount can be entered or calculated using the calculator button at the right of the check amount field.
Pay to the Order of – Type the name of the Payee or select a vendor from the drop down list. Frequently used vendors can be defined in the Setup – External Codes, Vendor window. If you want to use a vendor on a check, but have not previously entered the vendor information, you do not have to close the check to enter the new vendor. From the main menu, click Setup – External Codes – Vendors. The vendor entry window will open on top of the check window so you can enter the new vendor information. After you close the External Codes window, the new vendor will appear in the check’s drop-down list and can be used on the check.
Memo button – Opens a window so you can add additional information.
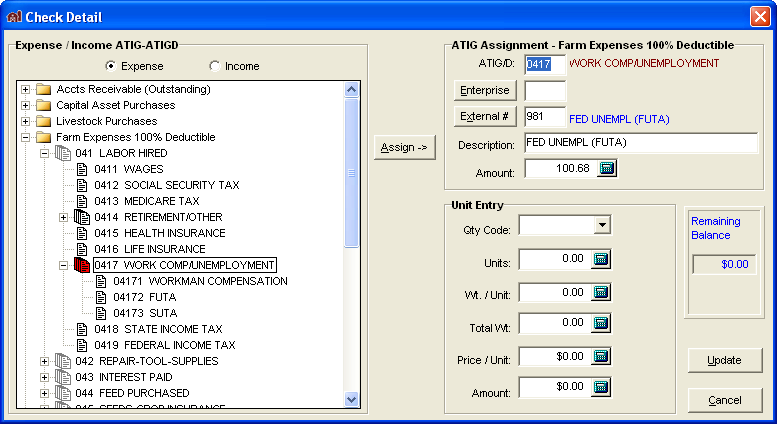
Detail Lines – Detail lines categorize expenses. Enter as many detail lines as necessary to properly record the expense. As each detail line is entered, the Amount Remaining is reduced by the amount of the detail lines. When the Amount Remaining is zero, the total of all detail lines is equal to the check amount.

There are two ways to enter the detail lines.
- If you choose the preference for Check Book Entry (see File menu – Preferences – Options Tab) as Novice, then you will get the large detailed input screen.
- Otherwise you can simply enter the information in the grid detail line without opening the window.
Code Listing – place the cursor in the ATIG/D code field and press Ctl-J or Ctrl-Enter to open the ATIG code selection window. Choose an ATIG/D code and click Apply to add the code to the detail line.Press Ctl-J or Ctrl-Enter when the cursor is in the following fields to get a list of appropriate codes:
- External code (Ext)
- Enterprise code (Ent)
- Quantity code (Qty Cd)
Income detail lines can be entered on a check if necessary. An income detail line will be shown in red instead of black and the income amount will be added to the amount remaining total. The same color scheme and logic will be used if an expense type ATIG/D is used on a deposit transaction.
- If you choose the preference for Check Book Entry (see File menu – Preferences – Options Tab) as Novice, then you will get the large detailed input screen.
You can also choose the starting field for each check in the Preferences setup (choose File: Preferences – Options Tab, Starting Field). Starting field choices are:
- Payee/Vendor
- Date
- Number
- Bank Account